What is Elastic Container Service (ECS)?
Amazon Elastic Container Service (ECS) is a container orchestration service. It allows you to deploy, manage, and scale containerized applications (Docker) easily. ECS takes care of placing containers on the appropriate infrastructure, managing their lifecycle, and ensuring the application is available very easily.
What is it used for?
ECS eliminates the complexity of manually managing container orchestration software. It serves us for:
- Scalability: Automatically increase or decrease the number of containers based on demand.
- High Availability: Run the application across multiple Availability Zones to prevent downtime.
- Simplified Management: Integrates natively with other AWS services such as Load Balancers (ALB), Security (IAM), and Monitoring (CloudWatch).
Creating an Elastic Container Service (ECS)
Go to the Amazon Elastic Container Service in the AWS console:
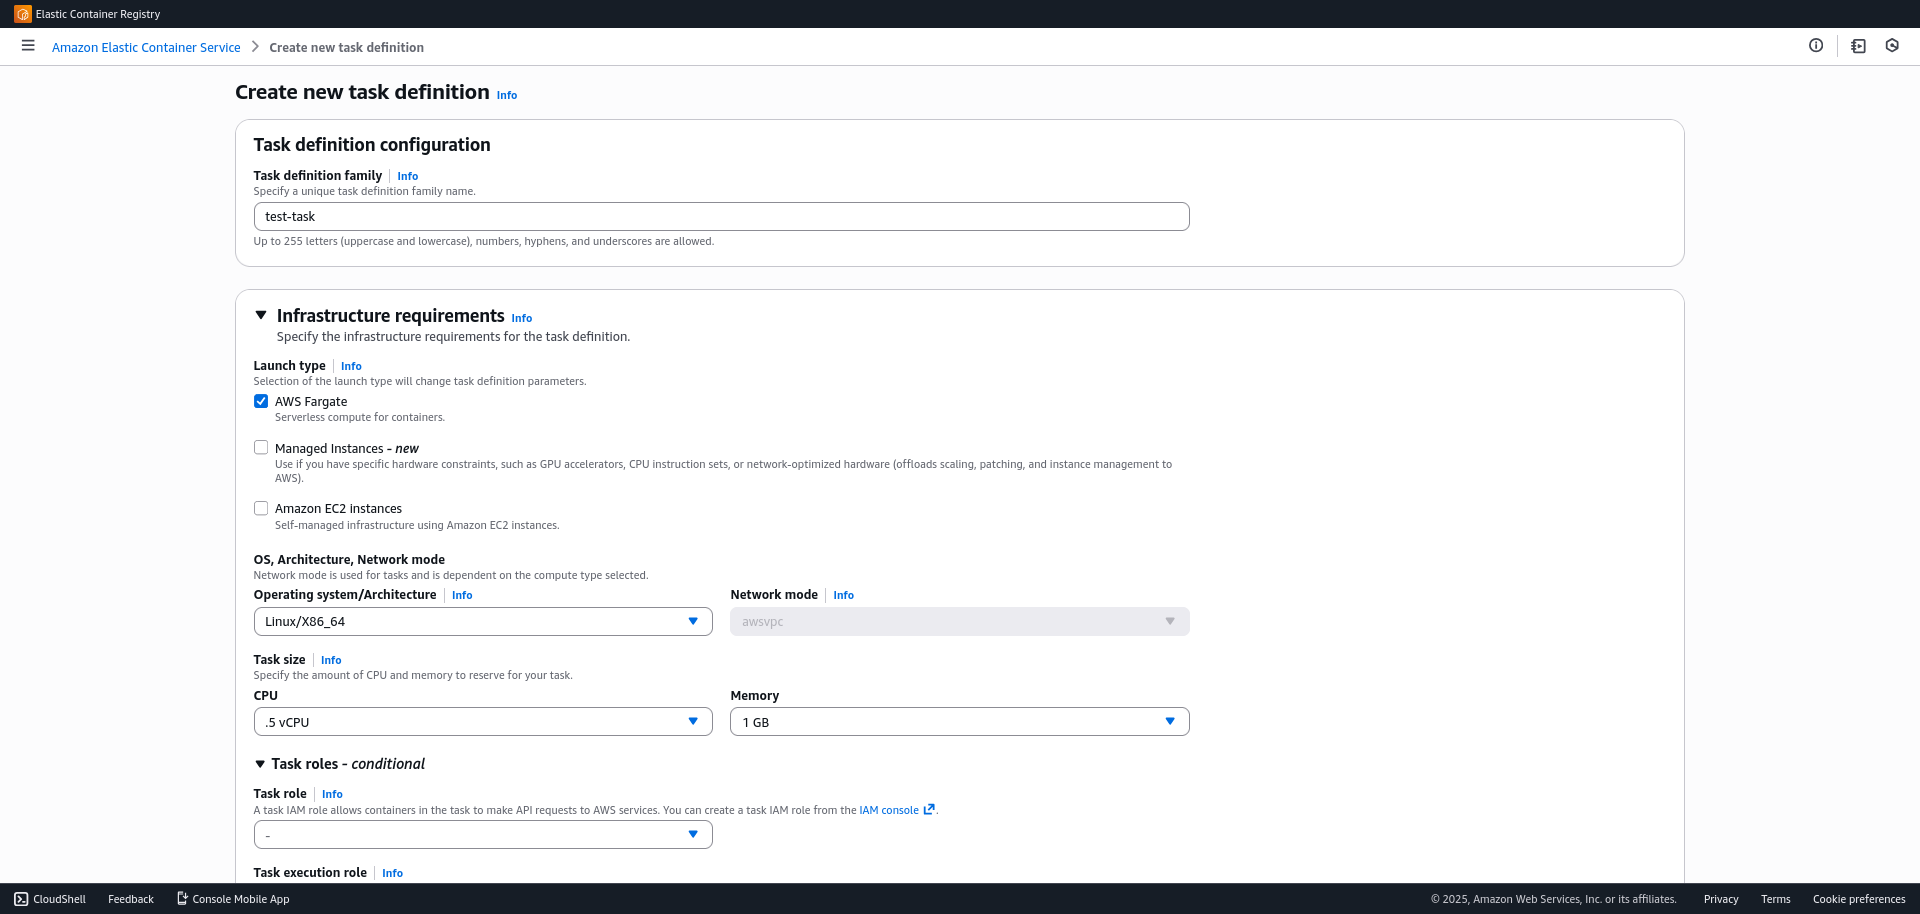
1. Create the "Task Definition"
The Task Definition is the blueprint for the application; it defines which Docker image to use, how much memory it needs, and how it should behave.
- In the side menu, go to
Task Definitions > Create new task definition. - Task configuration:
- Family name: Assign a name, for example:
task-name. - Launch Type: Select AWS Fargate (serverless management).
- OS/Architecture: Linux/X86_64.
- Task Size: Define the amount of CPU and RAM required for your container.
- Container Details
- Name:
container-name. - Image URI: Paste your image URI (from ECR or Docker Hub).
- Container Port: Specify the port you exposed in your Dockerfile (e.g., 3000, 8080).
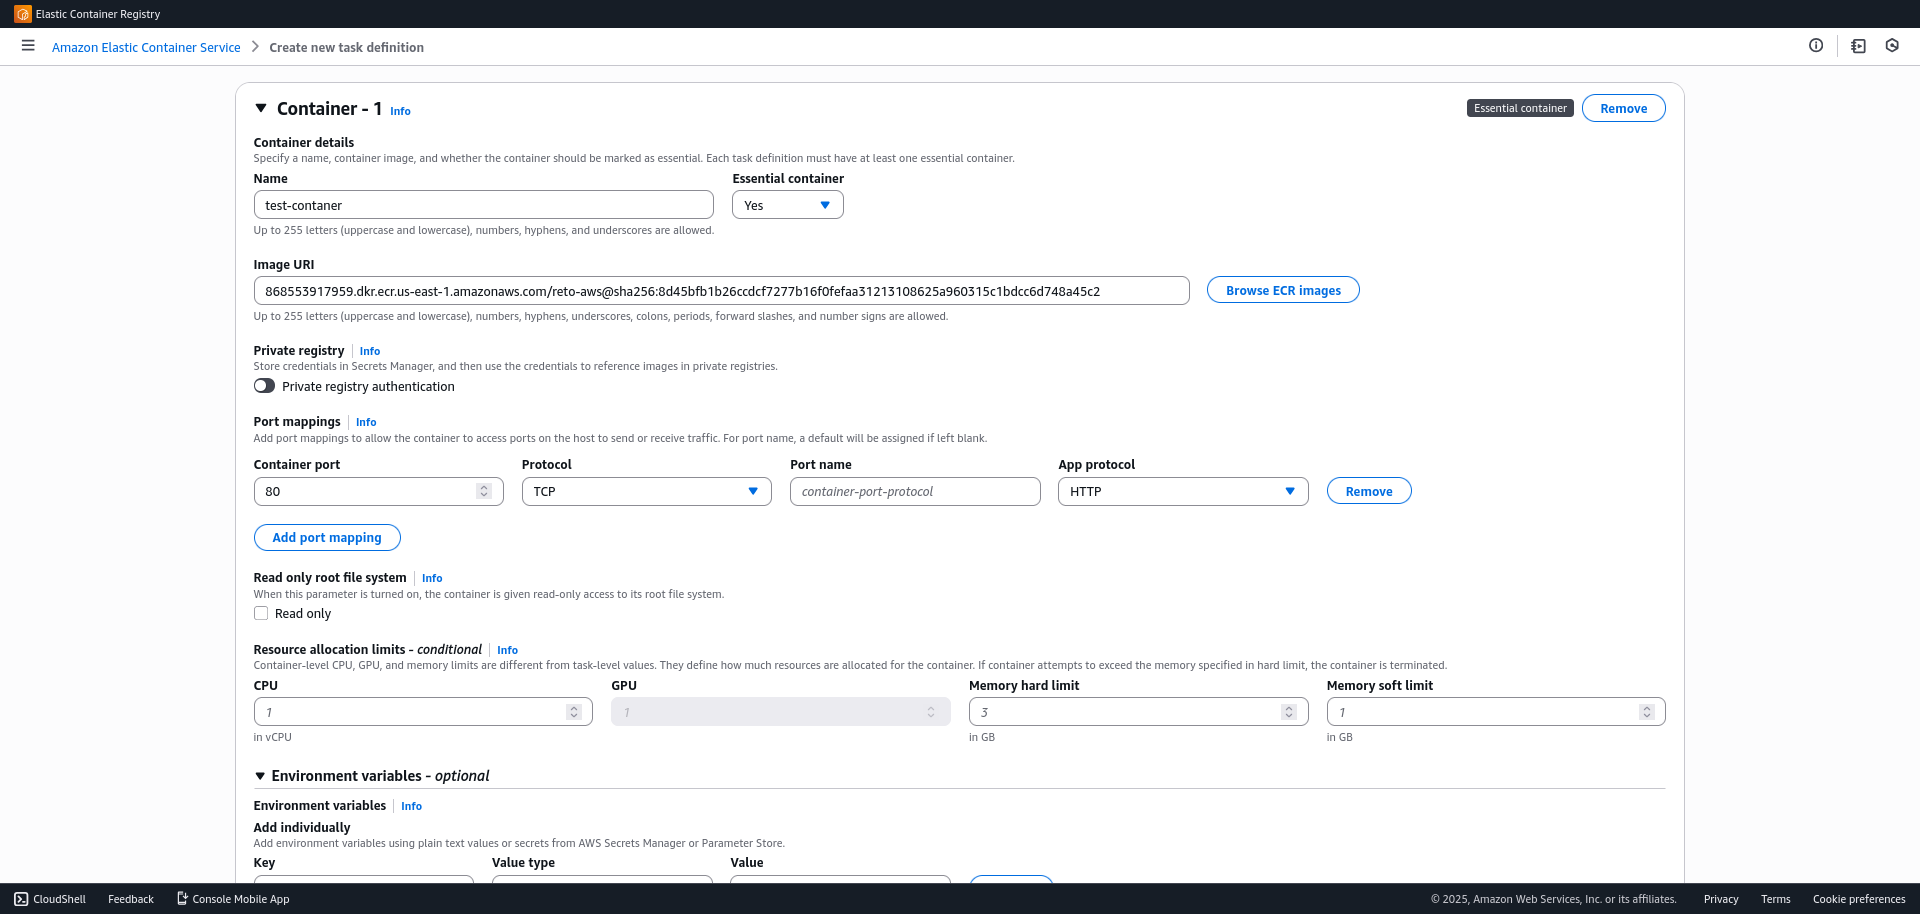
- (Optional) Define environment variables if your application requires them and finish the creation.
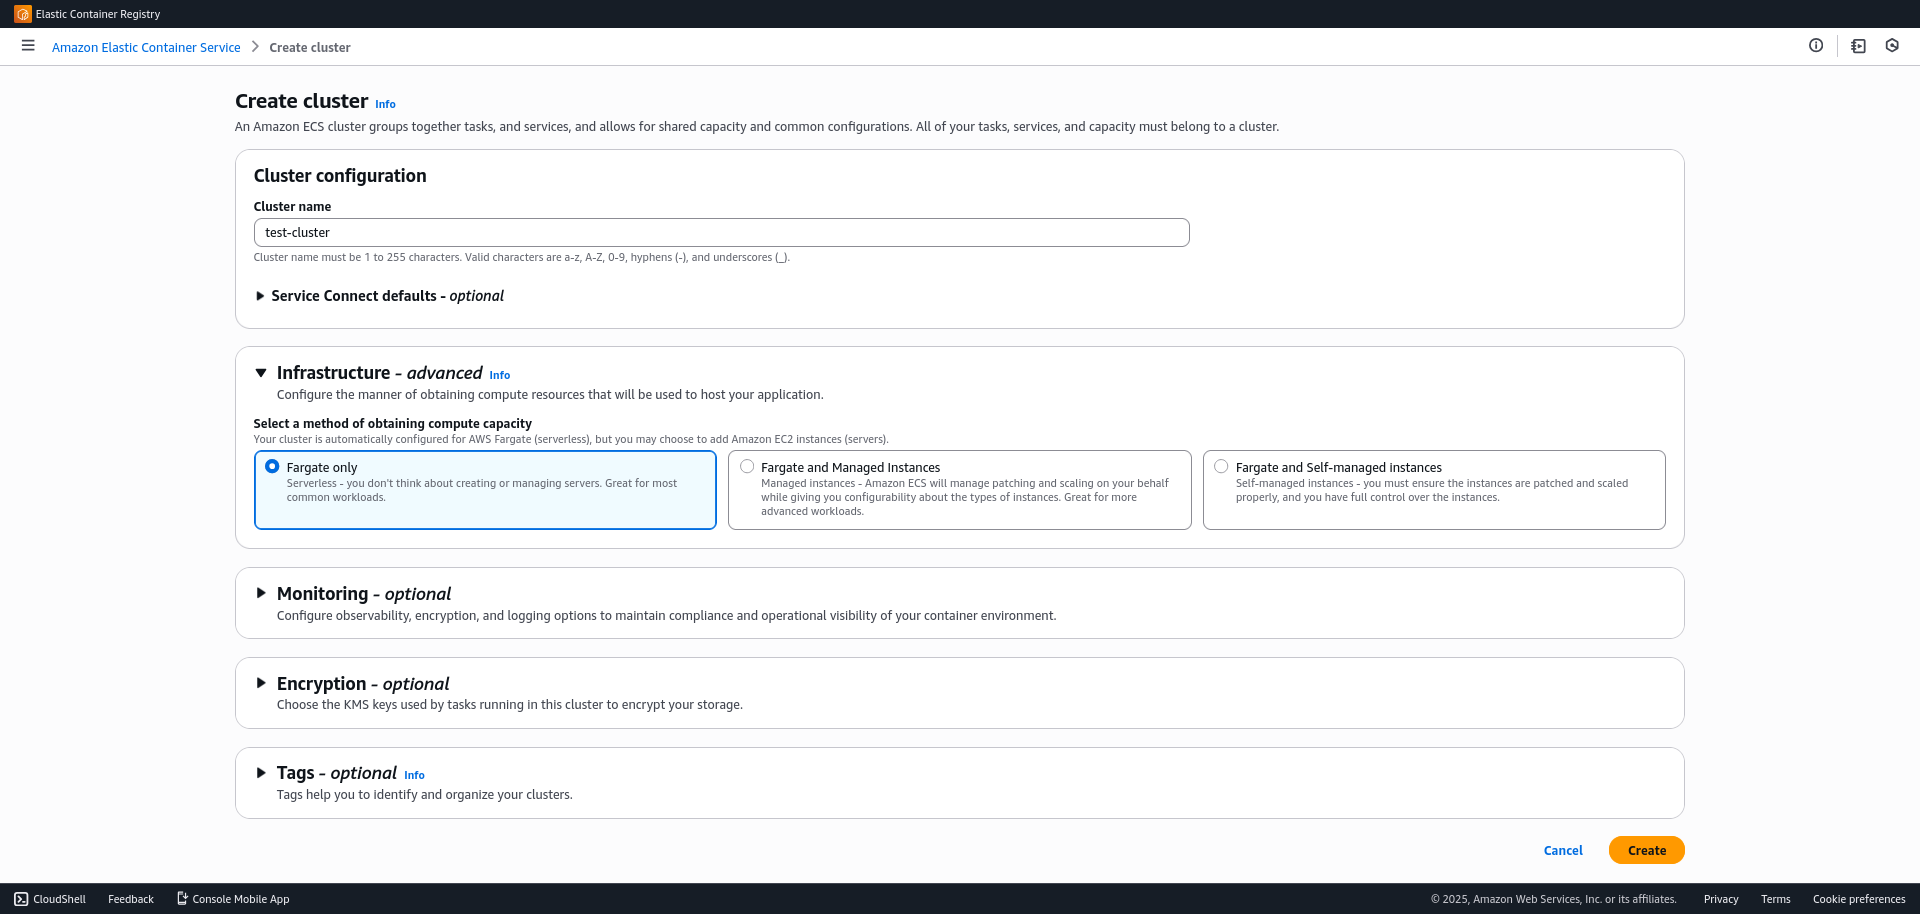
2. Create the Cluster
The cluster is the logical grouping of resources where your tasks will run.
- Go to
Clusters > Create Cluster. - Cluster name:
test-cluster. - Infrastructure: Ensure AWS Fargate (serverless) is checked.
- Click Create.
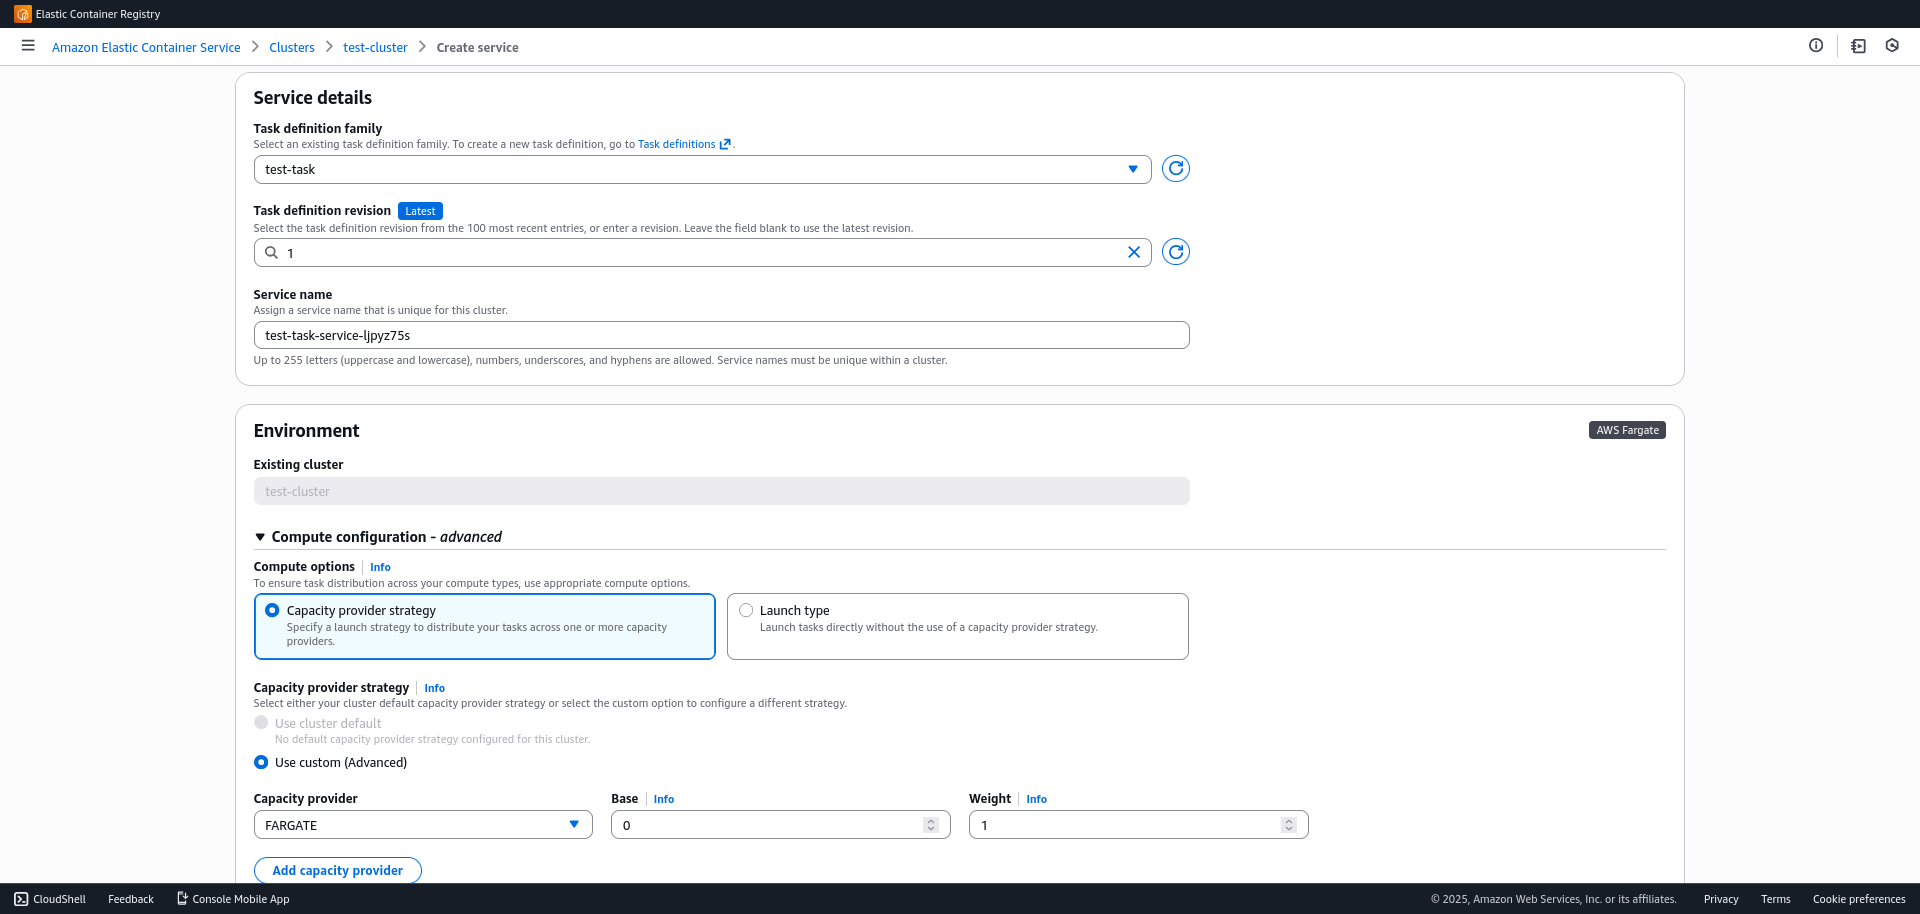
3. Create the Service and Load Balancer
In this step, we will link the container with the network and the load balancer to expose it to the internet.
- Enter the cluster you just created.
- In the Services tab, click Create.
- Service details:
- Select the "Task Definition" (Family) you created in step 1.
Deployment configuration:
- Desired tasks: (At least 2 is recommended to guarantee high availability and test load balancing).
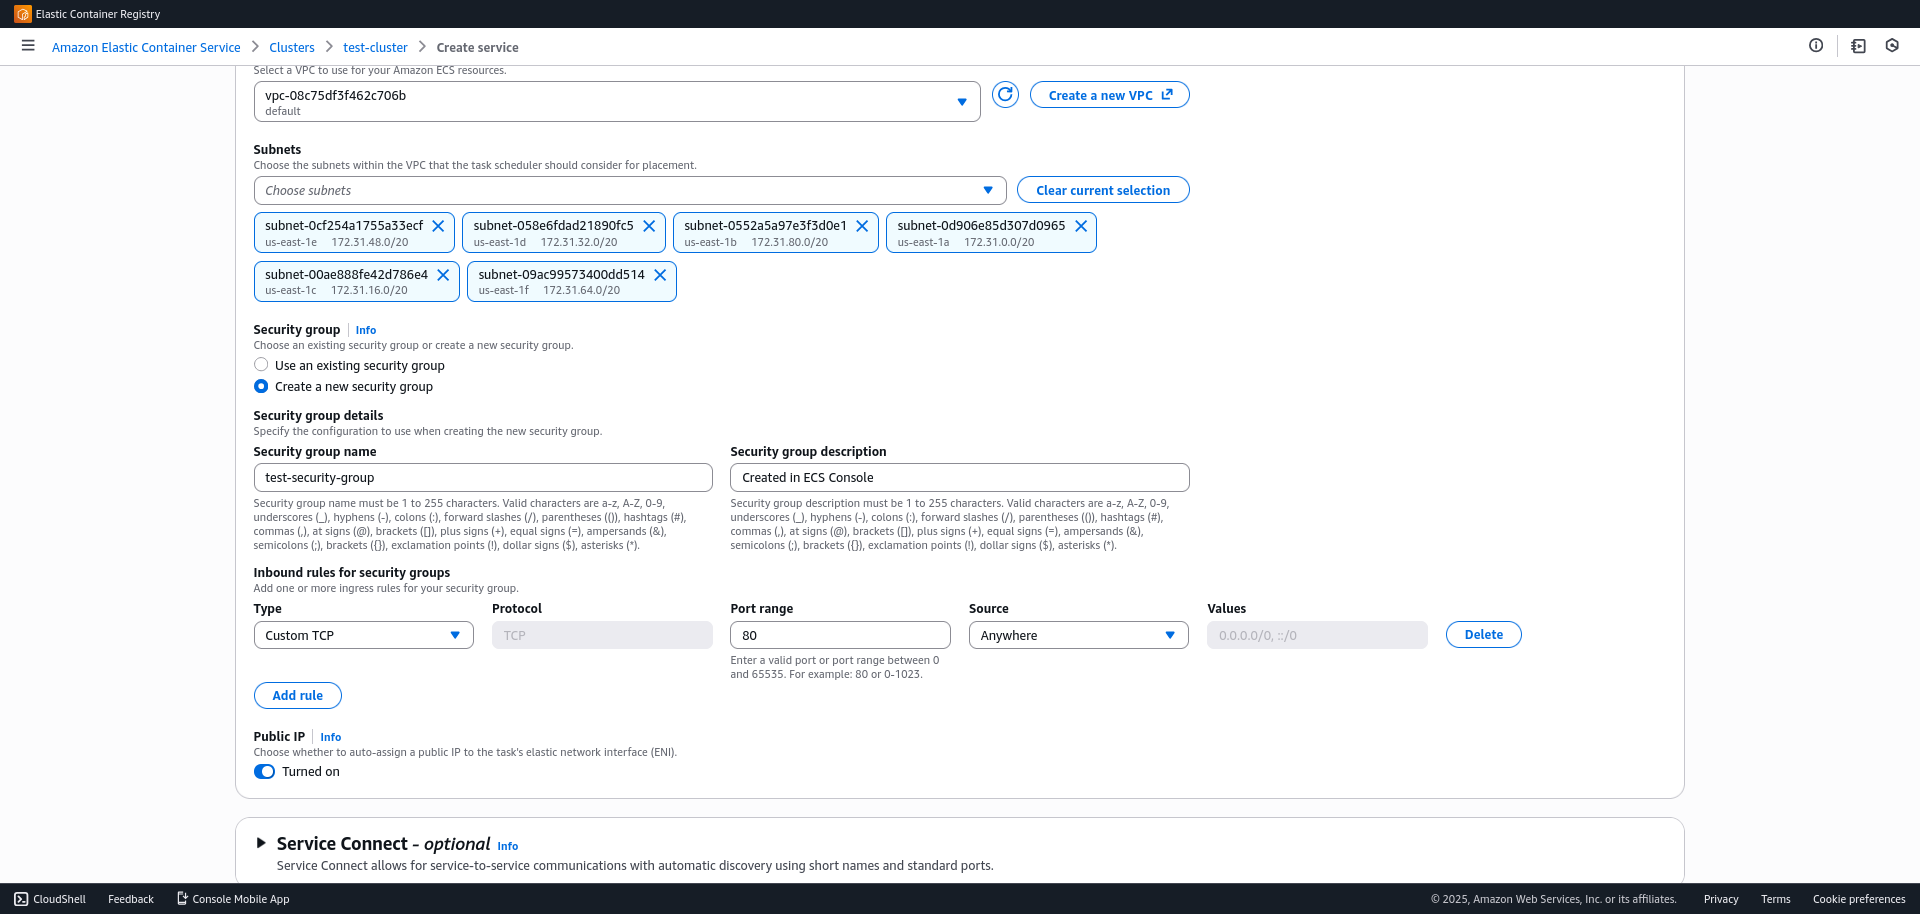
Networking:
- Security Group: Create a new one.
Open your app's port (Custom TCP) and allow traffic from "Anywhere" (0.0.0.0/0) temporarily (we will later restrict it to the ALB).
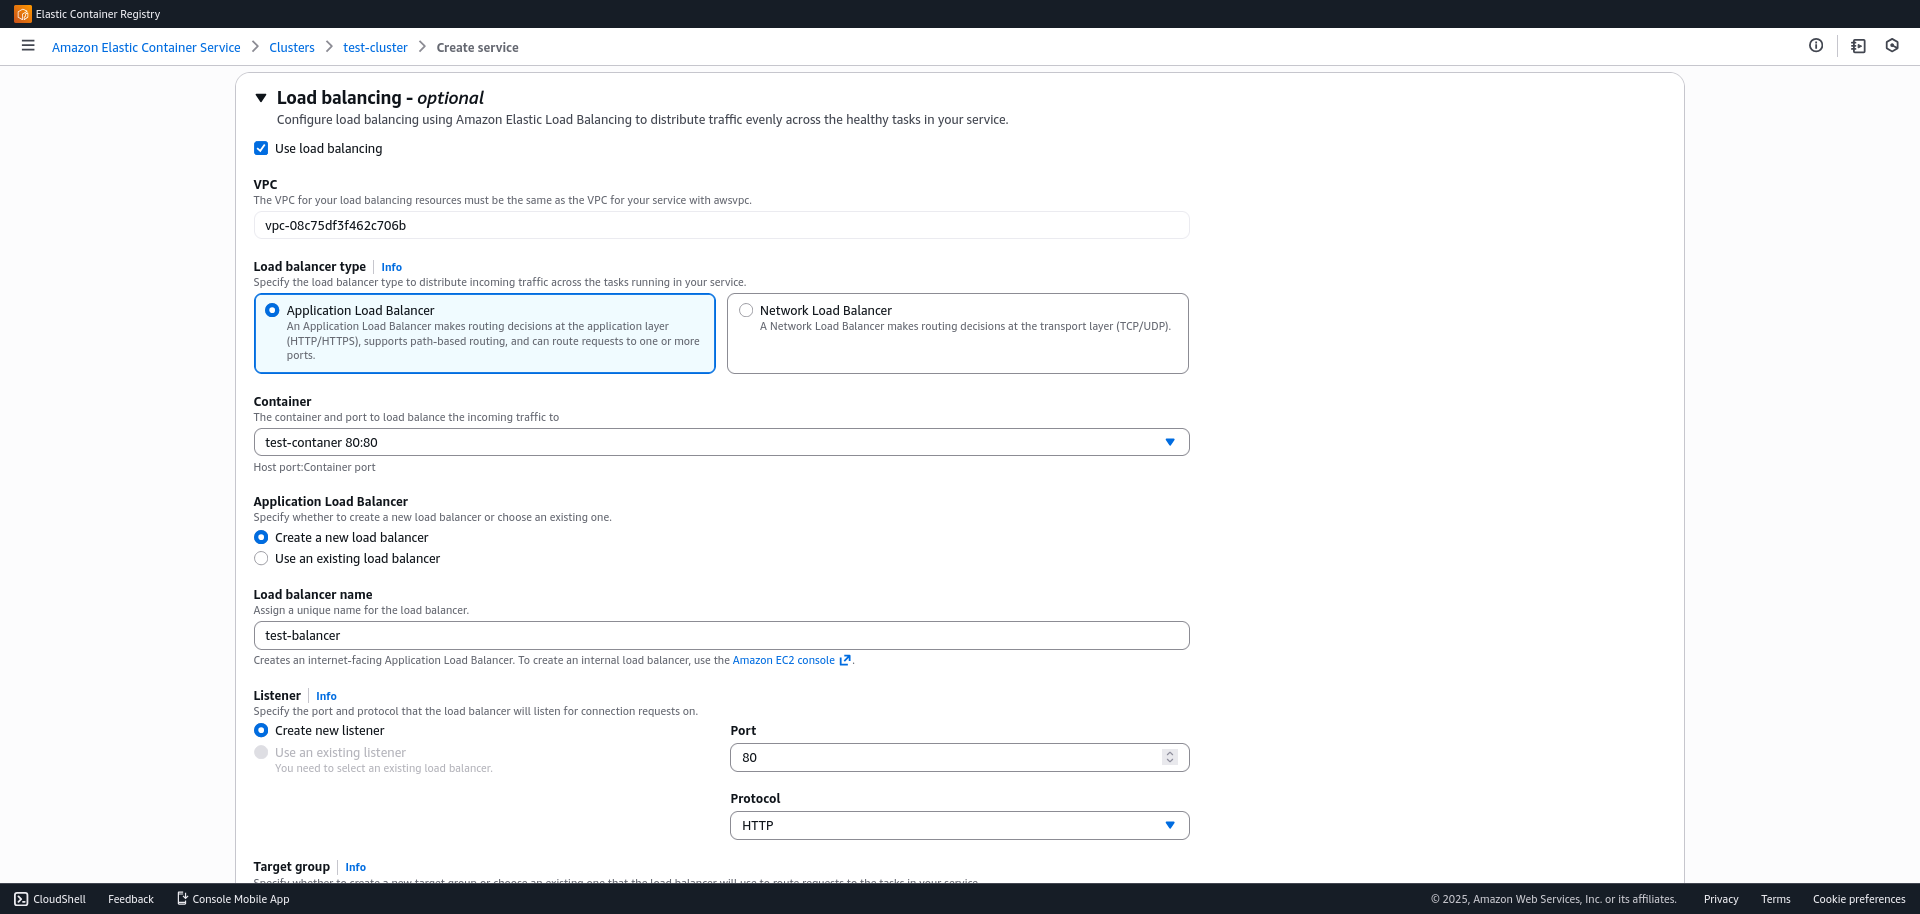
- Load balancing: Enable this option to distribute traffic.
- Load balancer type: Select Application Load Balancer (ALB).
- Load balancer name: Enter a name (e.g., api-alb). AWS will create the resource automatically.
- Container to load balance: Select your container and the previously configured port.
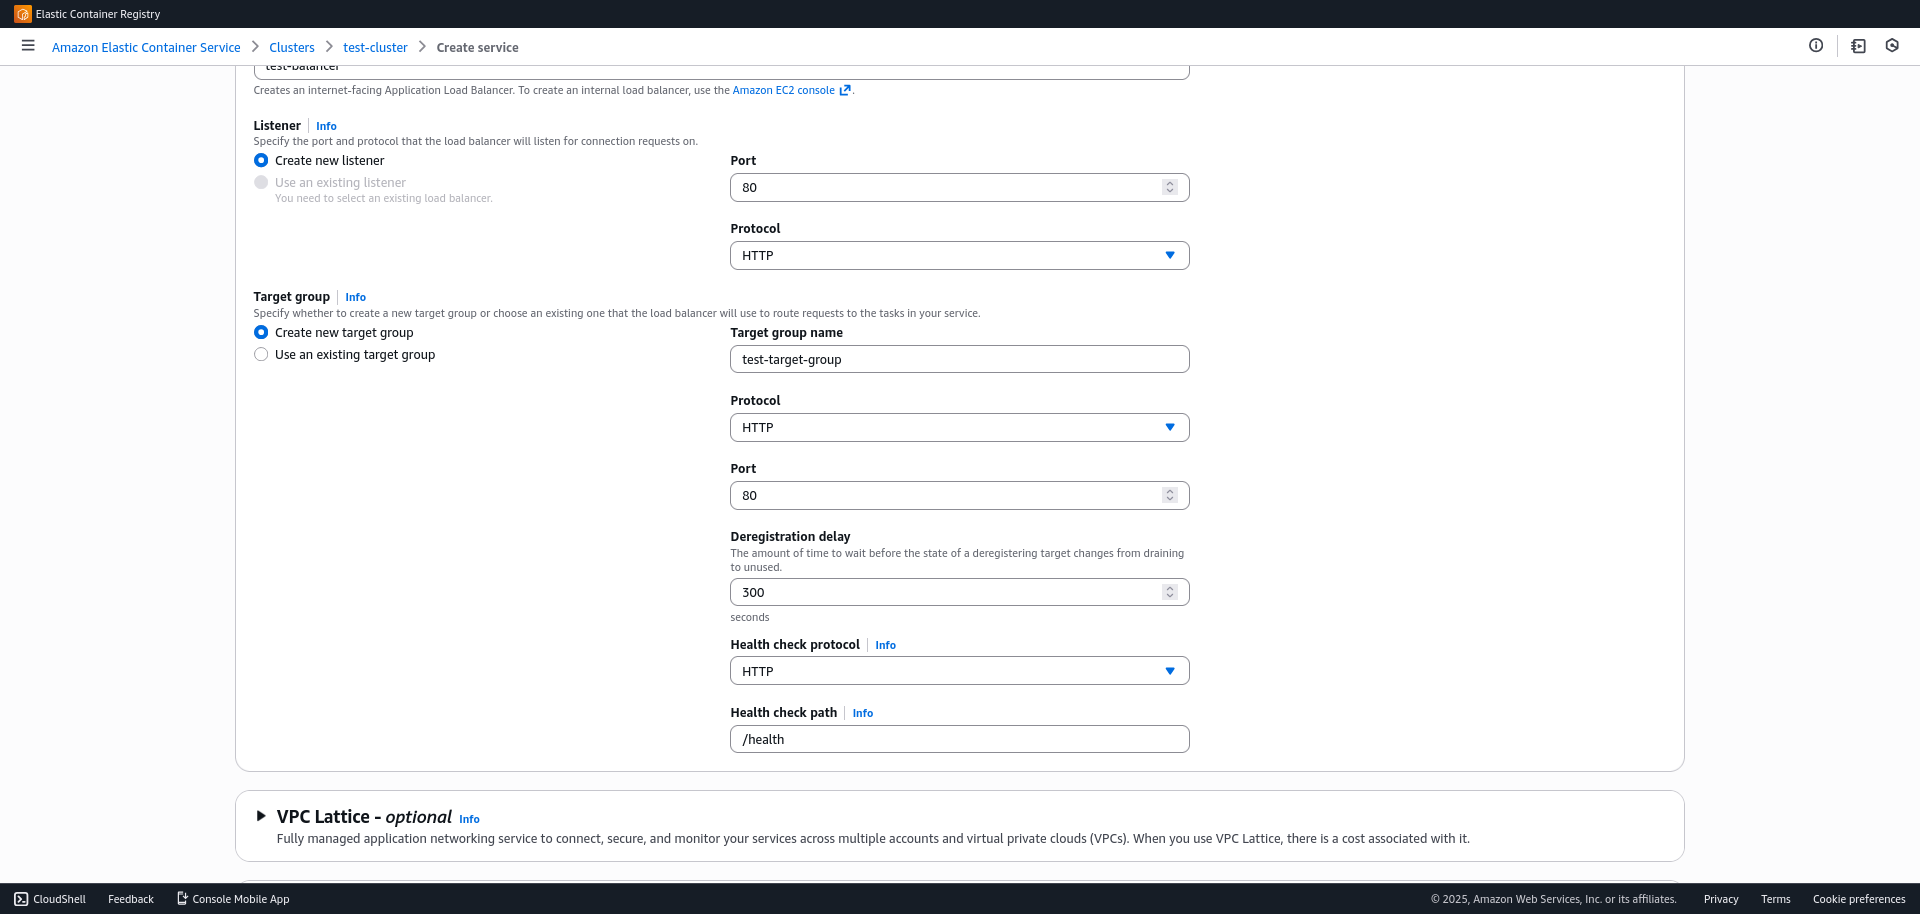
- Target group: Let it create a new one (e.g., create new).
- Listener: Port 80 (HTTP).
- Verify deployment:
- Go to the
EC2 > Load balancersconsole. - Select the created load balancer (ALB).
- Copy the DNS name, paste it into your browser, and verify that your application responds.
- Go to the
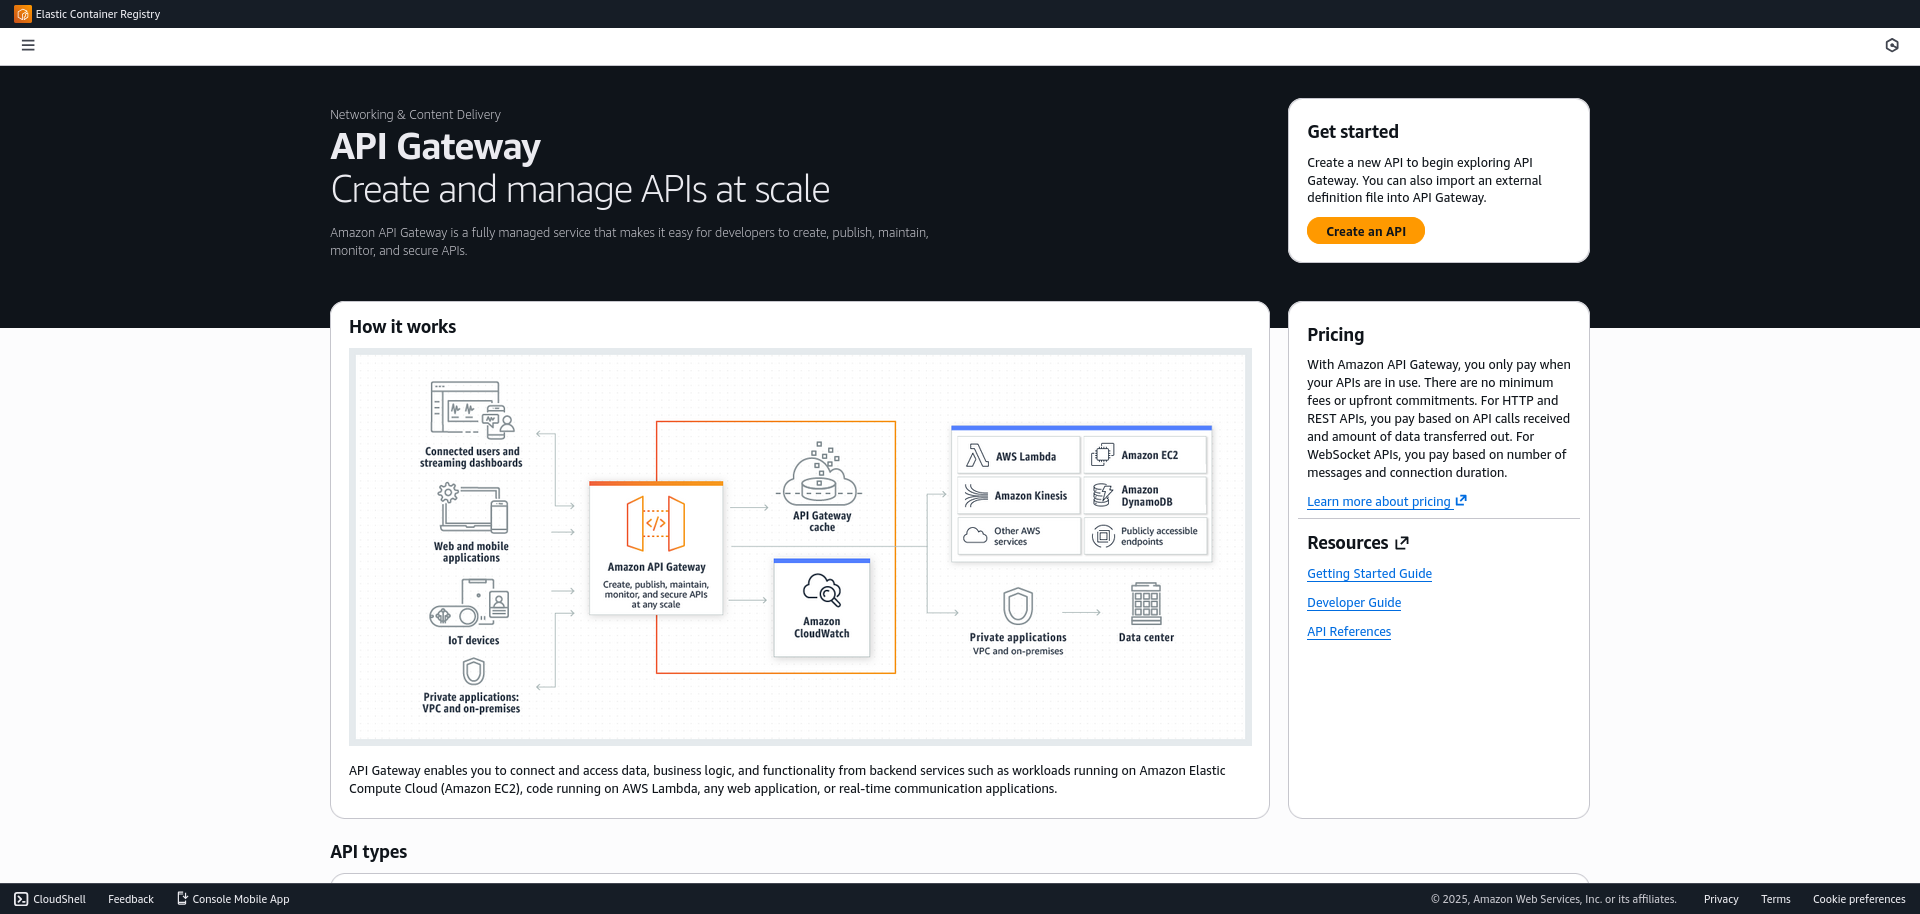
4. The API Gateway
To add a layer of management, security, and routing, we will place an API Gateway in front of the load balancer.
- Go to the API Gateway console.
- Select HTTP API (it is cheaper and faster than REST API for this case) or REST API.
- Create integration:
- Integration type: HTTP.
- Endpoint URL: Use the Load Balancer (ALB) DNS name.
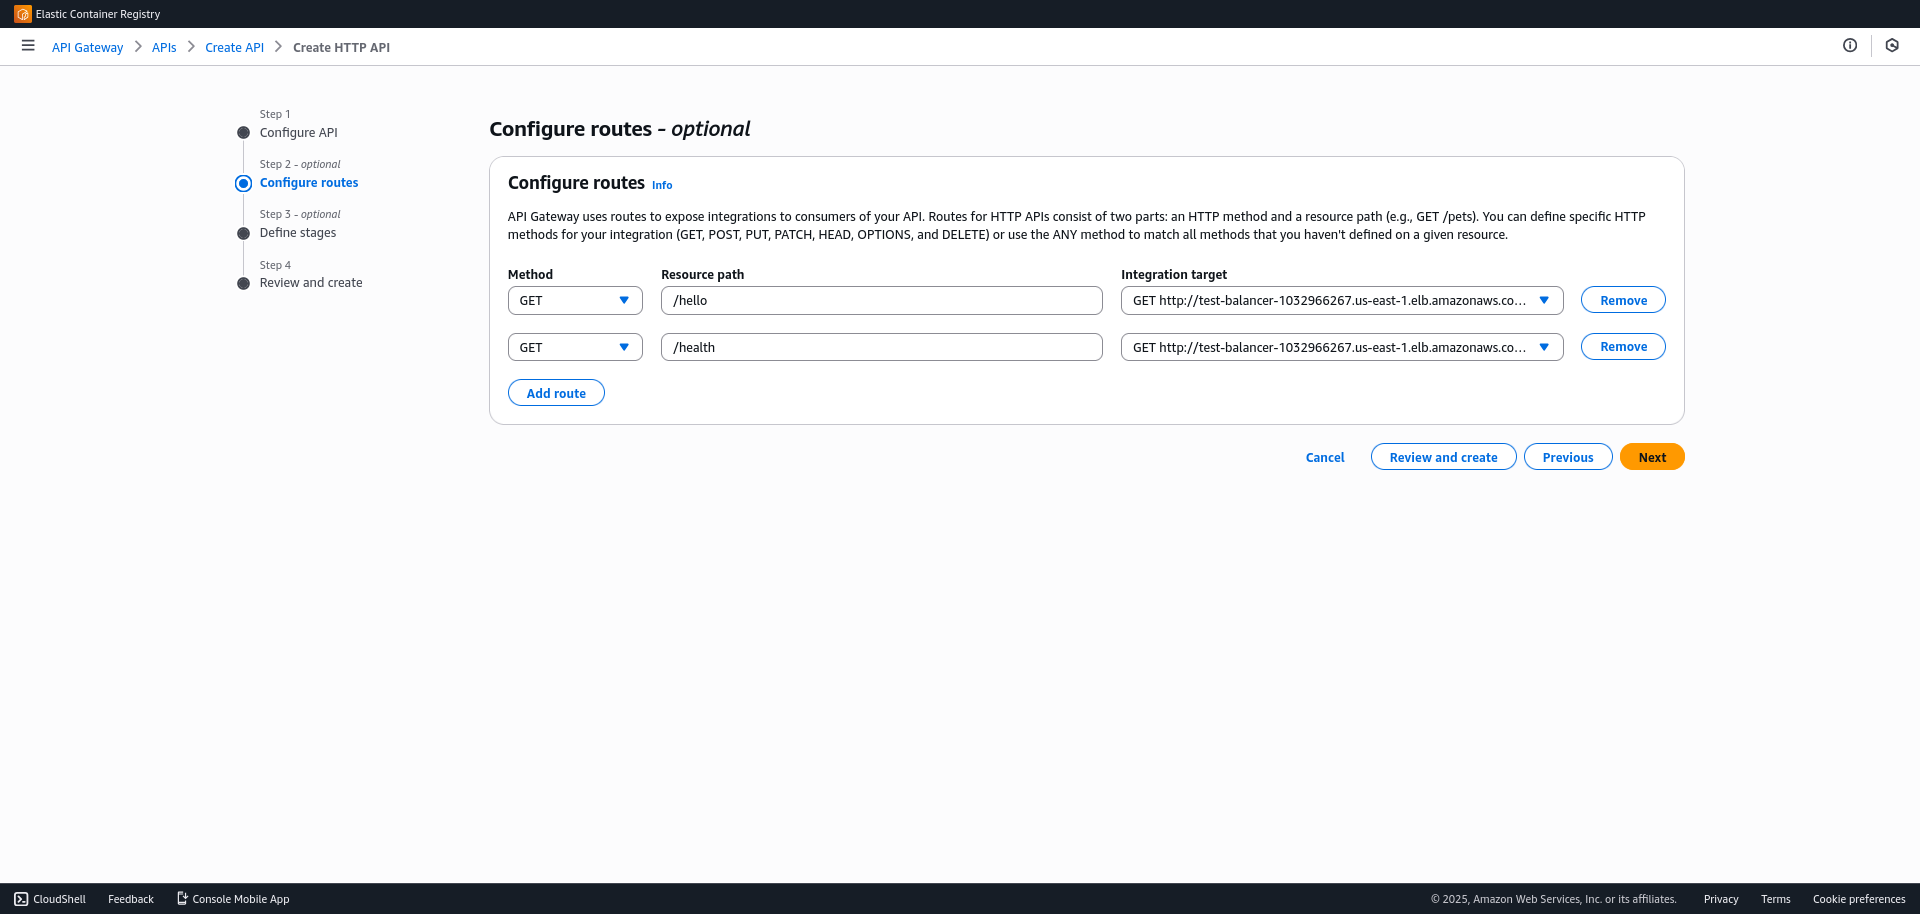
- Configure routes:
- Define the routes your API will handle (e.g., POST /users, GET /products).
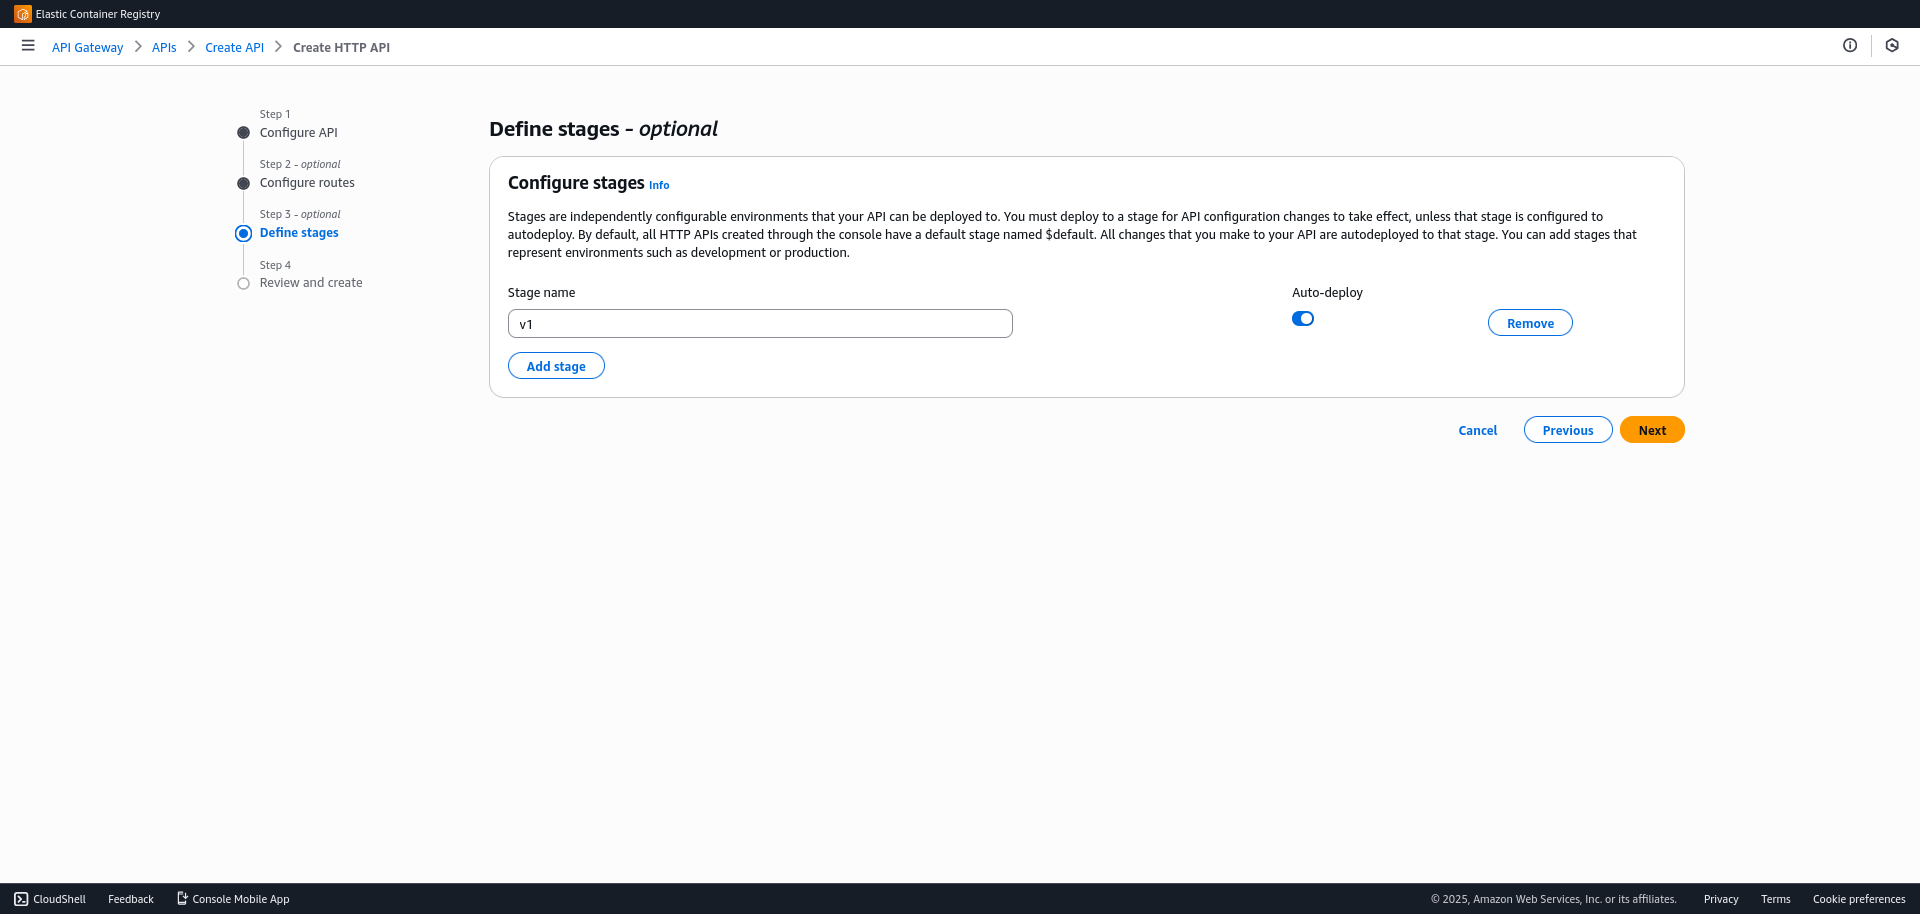
- Deploy
- Create a Stage named
prodorv1.
- Create a Stage named
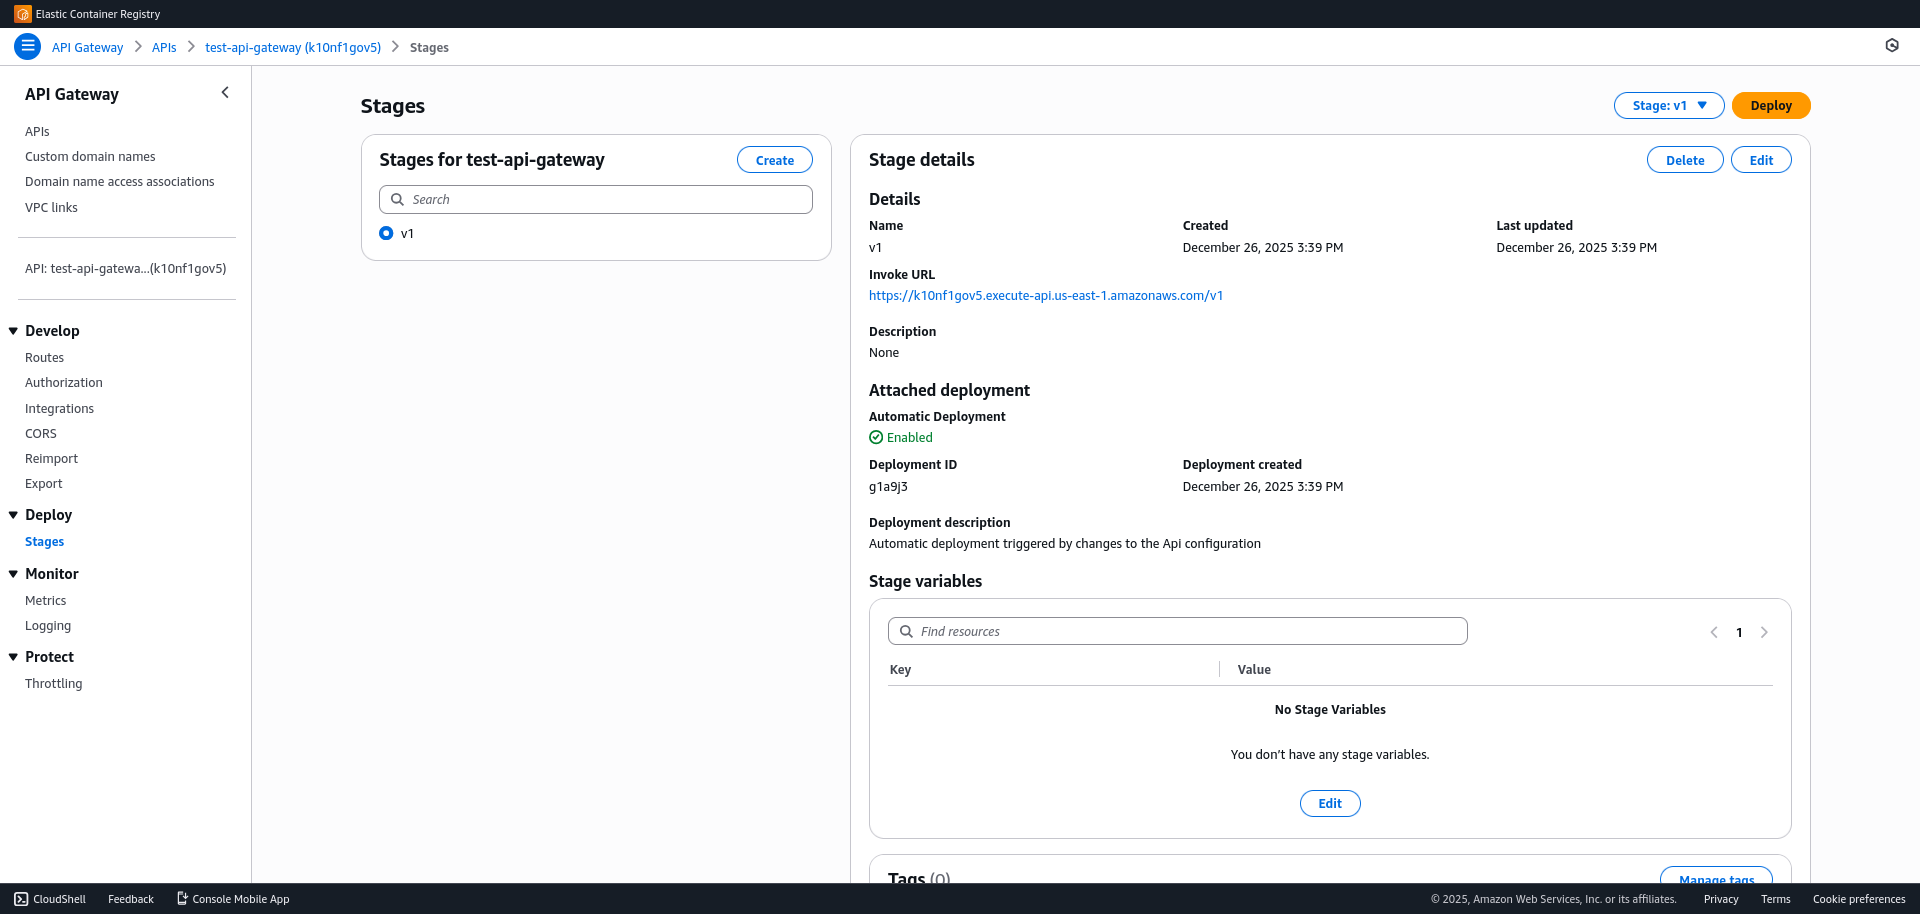
- Go to
Deploy > Stagesin the left menu. There you will find the Invoke URL. This is the final public URL to access your API.
The final architecture is: User -> API Gateway -> ALB -> ECS Fargate -> RDS.